

How to Get a Cool Mal List Animated Backgroun
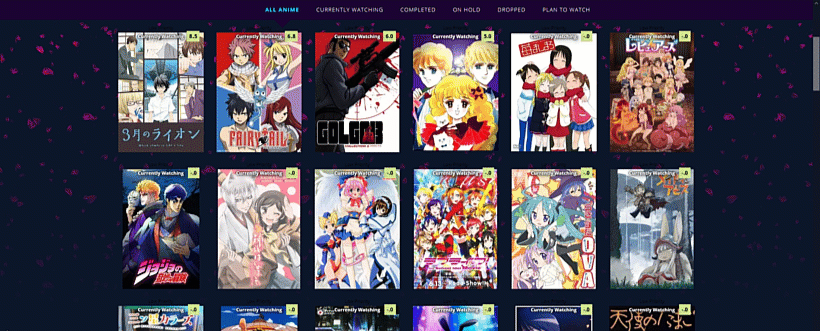
This popular grid-style layout originally made by 5cm has received massive updates- adding many new features and animated themes! 😀
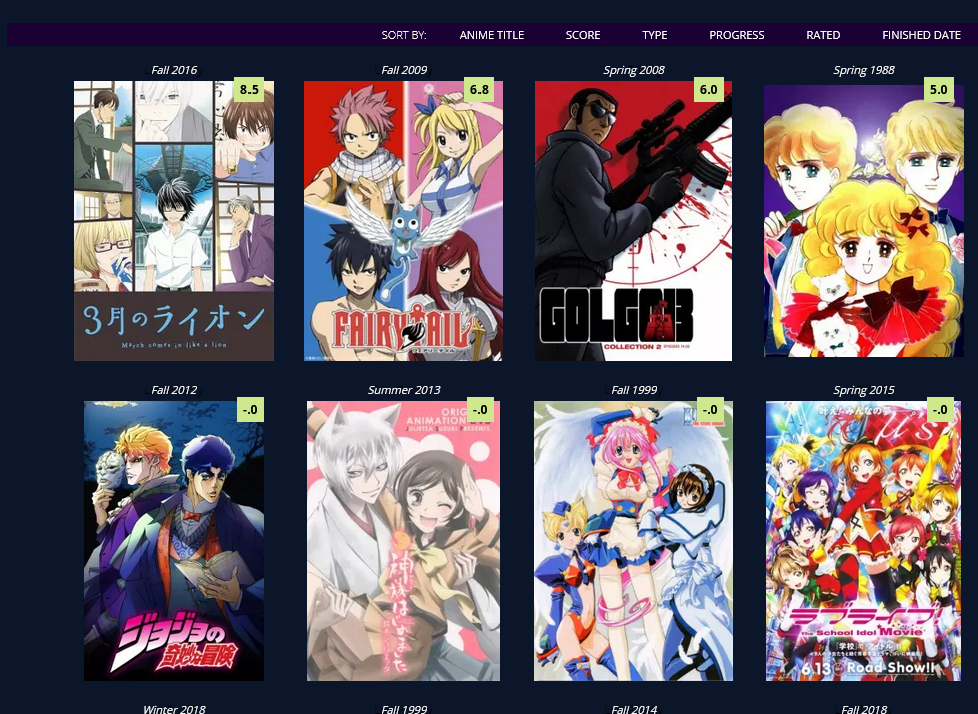
You can use all settings with it now, plus it's easy to use and customize including with decimal scores.
All themes are listed below with their source code (the layout's CSS). The alternates have animated intros I made- you can edit the animations with your own renders and backgrounds the same way you edit other layout codes! I've also listed new extensions you can use with this layout at the bottom of this newsletter. Have fun! Use the video tutorial if you don't know how to install a CSS layout code: https://www.youtube.com/watch?v=FeYbQEpf0l0
To change the images, you replace the image links with new direct links from images you upload to Imgur. There's notes in the code to guide you and tell you what each image link makes on the layout so you can replace the backgrounds and characters with what you want. Changing the images and colors works the same way as in this layout: You can speed up animations by lowering the seconds (change 5s to 3s for example to speed it up). To remove an animation completely, delete the animation line of code from a section with the animation you want to remove. For help with character renders (cut-outs) see this topic: For help with colors and background-colors see this topic: For everything else, including how to install a layout in case you don't know, see the full list of CSS topics here, and also the extensions at the bottom of the post!
https://myanimelist.net/forum/?topicid=1640096
https://myanimelist.net/forum/?topicid=400287
https://myanimelist.net/forum/?topicid=1909051
https://myanimelist.net/forum/?topicid=1499059
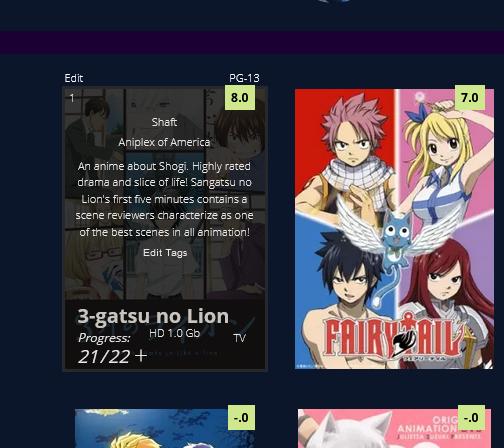
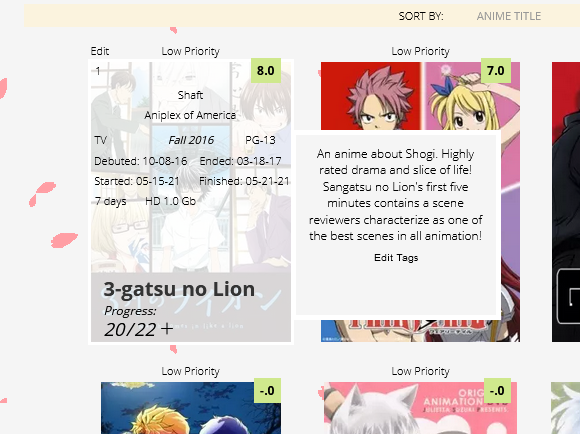
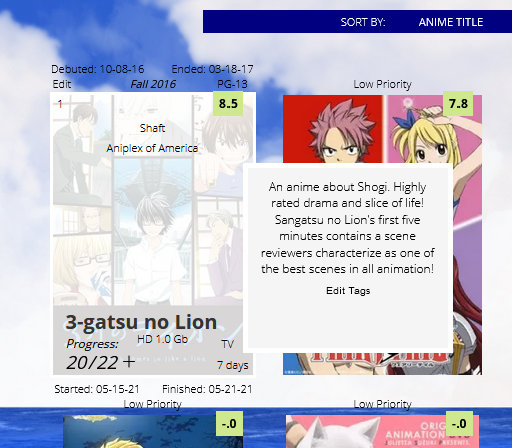
Copy and paste the codes over and edit them with new anime if you want more decimal scores. Change "anime" in the code to "manga" for manga. The decimal score is the number after content.
Scroll down to DECIMAL SCORES and change the number or "ID" after "anime" in one of the codes to the ID number of the anime you want to change. The ID number is found in the URL on the anime's page. For example, Code Geass's ID number is 1575
https://myanimelist.net/anime/1575/Code_Geass__Hangyaku_no_Lelouch
Layouts
Shinobu Layout
Animated Intro

After Intro
Source Code
Important, Read: After you paste the code to your CSS edit box, you should change "SpaceCowboy" and "DateYukata" in the second and third imports to your username. This provides personalized HD preview pics which are more reliable than the defaults. Your list(s) will also load significantly faster this way. However, lists set to private and friends-only can't use personalized preview pics and shouldn't edit them. https://pastebin.com/raw/dRmd5dpZ Adding a dark overlay to anime/manga After installing the layout, add these codes to the bottom if you want an easy to read dark overlay on your anime and manga.
/* DARK OVERLAY ON ANIME/MANGA Shows up when you point the cursor to them. This will override the original codes used to customize some of the colors and overlay. */ .list-table .list-table-data:hover .data.title { background: rgba(5,5,5,0.8); outline: 3px solid rgba(45,45,45,0.8); } /* OVERLAY FONT COLOR */ body,.list-table .list-table-data .data.volume a,.list-table .list-table-data .data.progress,.list-table .list-table-data .data.chapter a,.list-table .list-table-data .data.studio,.list-table .list-table-data .data.licensor,.list-table .list-table-data .data.progress a,.list-table .list-table-data .data.magazine a,.list-table .list-table-data .data.studio a,.list-table .list-table-data .data.licensor a,.list-table .list-table-data .data.tags a,.list-table .list-table-data .tags .edit{ color: rgb(232, 230, 227) !important ; } .list-table .list-table-data .data.progress .fa:hover{ color: #90ee90; } /* ANIME TITLE */ .list-table .list-table-data .data.title .link{ color: #C8C3BC !important; }
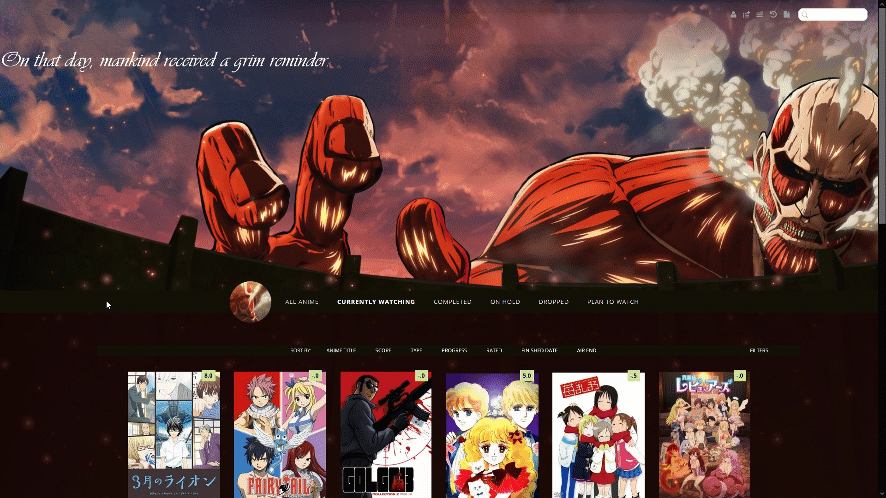
Attack on Titan Layout
Animated Intro
After Intro
Source Code
Important, Read: After you paste the code to your CSS edit box, you should change "SpaceCowboy" and "DateYukata" in the second and third imports to your username. This provides personalized HD preview pics which are more reliable than the defaults. Your list(s) will also load significantly faster this way. However, lists set to private and friends-only can't use personalized preview pics and shouldn't edit them. https://pastebin.com/raw/nwwTEKPf Adding a dark overlay to anime/manga After installing the layout, add these codes to the bottom if you want an easy to read dark overlay on your anime and manga.
/* DARK OVERLAY ON ANIME/MANGA Shows up when you point the cursor to them. This will override the original codes used to customize some of the colors and overlay. */ .list-table .list-table-data:hover .data.title { background: rgba(5,5,5,0.8); outline: 3px solid rgba(45,45,45,0.8); } /* OVERLAY FONT COLOR */ body,.list-table .list-table-data .data.volume a,.list-table .list-table-data .data.progress,.list-table .list-table-data .data.chapter a,.list-table .list-table-data .data.studio,.list-table .list-table-data .data.licensor,.list-table .list-table-data .data.progress a,.list-table .list-table-data .data.magazine a,.list-table .list-table-data .data.studio a,.list-table .list-table-data .data.licensor a,.list-table .list-table-data .data.tags a,.list-table .list-table-data .tags .edit{ color: rgb(232, 230, 227) !important ; } .list-table .list-table-data .data.progress .fa:hover{ color: #90ee90; } /* ANIME TITLE */ .list-table .list-table-data .data.title .link{ color: #C8C3BC !important; }
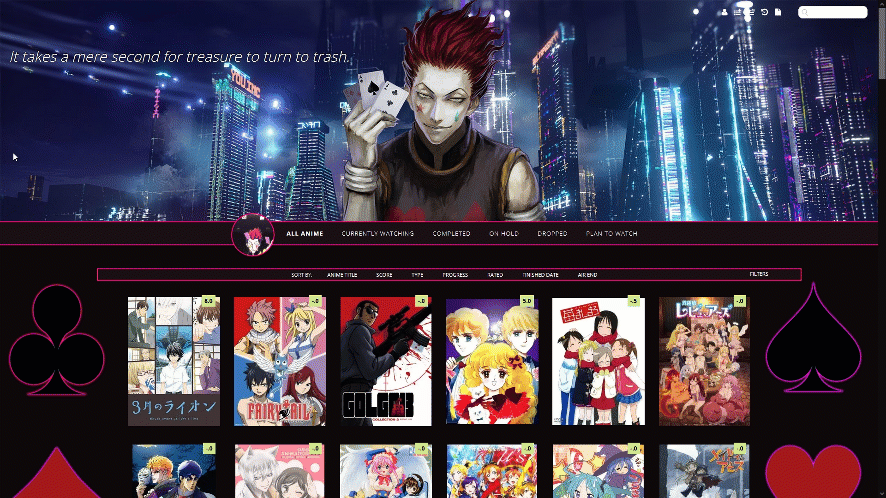
Hisoka Layout (Opera GX Colors)
Animated Intro
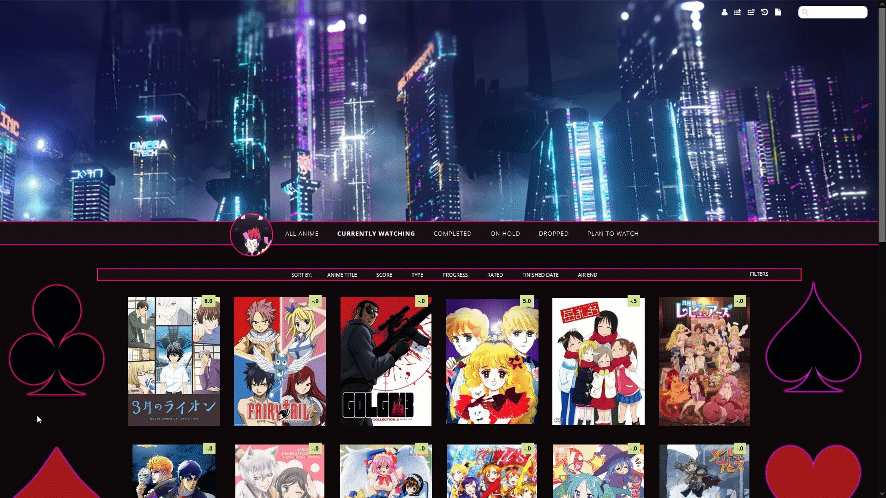
After Intro
Source Code
Important, Read: After you paste the code to your CSS edit box, you should change "SpaceCowboy" and "DateYukata" in the second and third imports to your username. This provides personalized HD preview pics which are more reliable than the defaults. Your list(s) will also load significantly faster this way. However, lists set to private and friends-only can't use personalized preview pics and shouldn't edit them. https://pastebin.com/raw/vxDyRL67 Adding a dark overlay to anime/manga After installing the layout, add these codes to the bottom if you want an easy to read dark overlay on your anime and manga.
/* DARK OVERLAY ON ANIME/MANGA Shows up when you point the cursor to them. This will override the original codes used to customize some of the colors and overlay. */ .list-table .list-table-data:hover .data.title { background: rgba(5,5,5,0.8); outline: 3px solid rgba(45,45,45,0.8); } /* OVERLAY FONT COLOR */ body,.list-table .list-table-data .data.volume a,.list-table .list-table-data .data.progress,.list-table .list-table-data .data.chapter a,.list-table .list-table-data .data.studio,.list-table .list-table-data .data.licensor,.list-table .list-table-data .data.progress a,.list-table .list-table-data .data.magazine a,.list-table .list-table-data .data.studio a,.list-table .list-table-data .data.licensor a,.list-table .list-table-data .data.tags a,.list-table .list-table-data .tags .edit{ color: rgb(232, 230, 227) !important ; } .list-table .list-table-data .data.progress .fa:hover{ color: #90ee90; } /* ANIME TITLE */ .list-table .list-table-data .data.title .link{ color: #C8C3BC !important; }
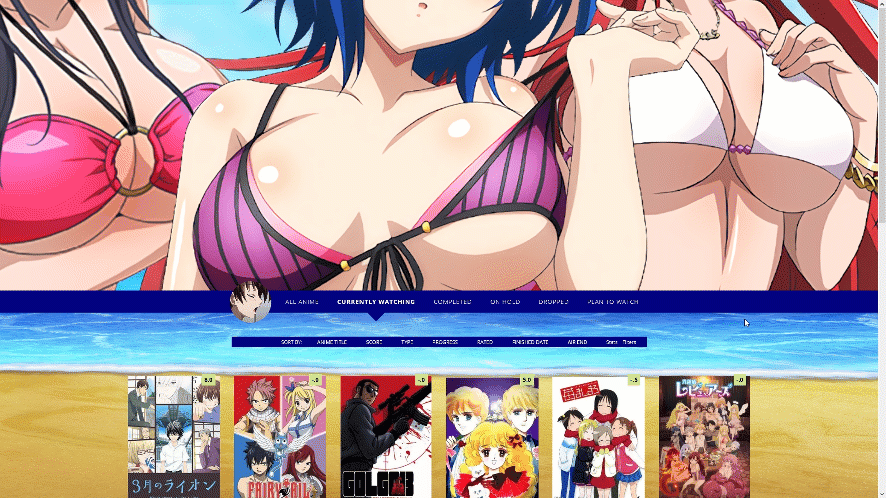
Ecchi Beach Layouts
Default Animated Intro

Triple Booba Animated Intro
Booty-lovers Animated Intro

After Intros

Source Code
Important, Read: After you paste the code to your CSS edit box, you should change "SpaceCowboy" and "DateYukata" in the second and third imports to your username. This provides personalized HD preview pics which are more reliable than the defaults. Your list(s) will also load significantly faster this way. However, lists set to private and friends-only can't use personalized preview pics and shouldn't edit them. Default Triple Booba Booty Adding a dark overlay to anime/manga After installing the layout, add these codes to the bottom if you want an easy to read dark overlay on your anime and manga.
https://pastebin.com/raw/AVjBPT8e
https://pastebin.com/raw/KvnHWGMi
https://pastebin.com/raw/PAW019gK
/* DARK OVERLAY ON ANIME/MANGA Shows up when you point the cursor to them. This will override the original codes used to customize some of the colors and overlay. */ .list-table .list-table-data:hover .data.title { background: rgba(5,5,5,0.8); outline: 3px solid rgba(45,45,45,0.8); } /* OVERLAY FONT COLOR */ body,.list-table .list-table-data .data.volume a,.list-table .list-table-data .data.progress,.list-table .list-table-data .data.chapter a,.list-table .list-table-data .data.studio,.list-table .list-table-data .data.licensor,.list-table .list-table-data .data.progress a,.list-table .list-table-data .data.magazine a,.list-table .list-table-data .data.studio a,.list-table .list-table-data .data.licensor a,.list-table .list-table-data .data.tags a,.list-table .list-table-data .tags .edit{ color: rgb(232, 230, 227) !important ; } .list-table .list-table-data .data.progress .fa:hover{ color: #90ee90; } /* ANIME TITLE */ .list-table .list-table-data .data.title .link{ color: #C8C3BC !important; }
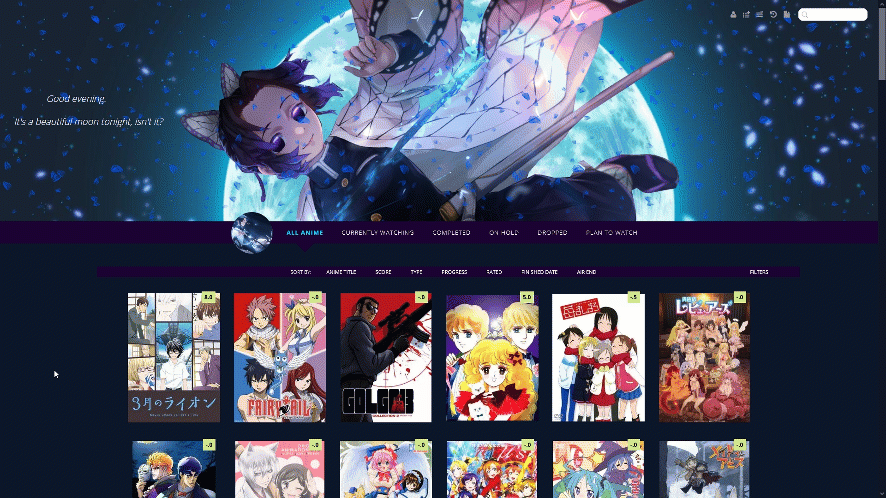
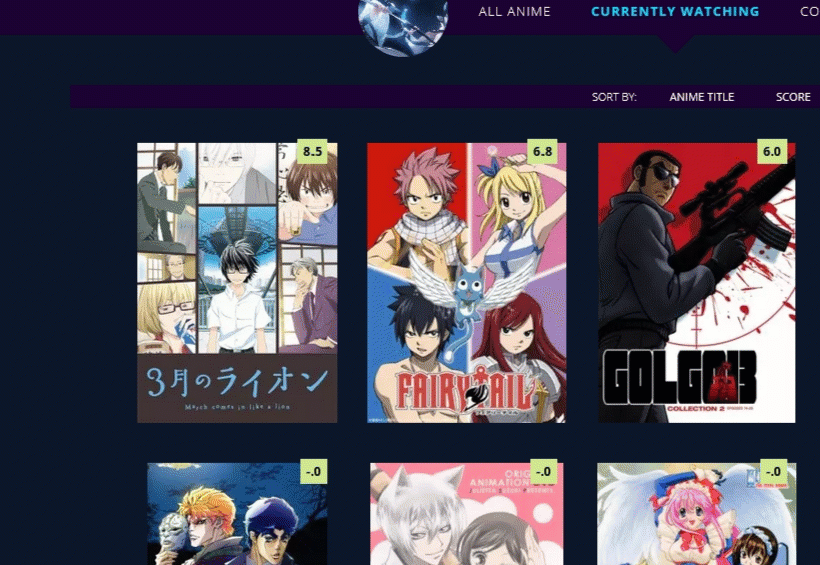
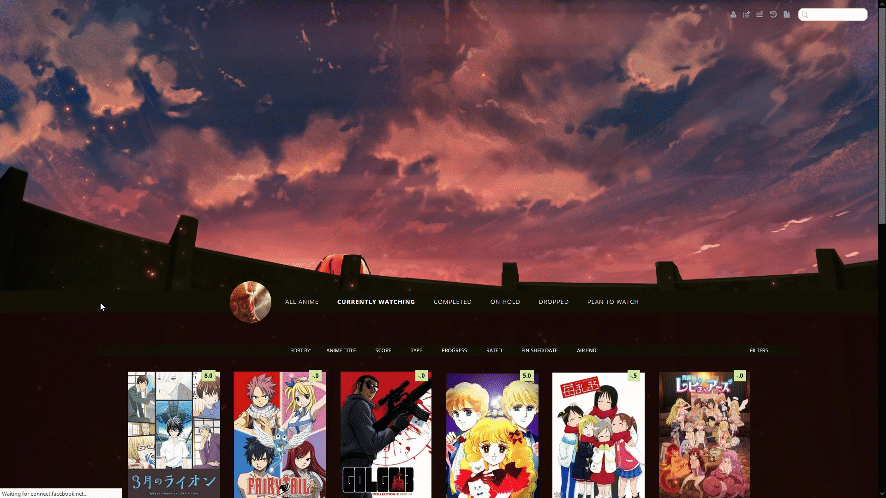
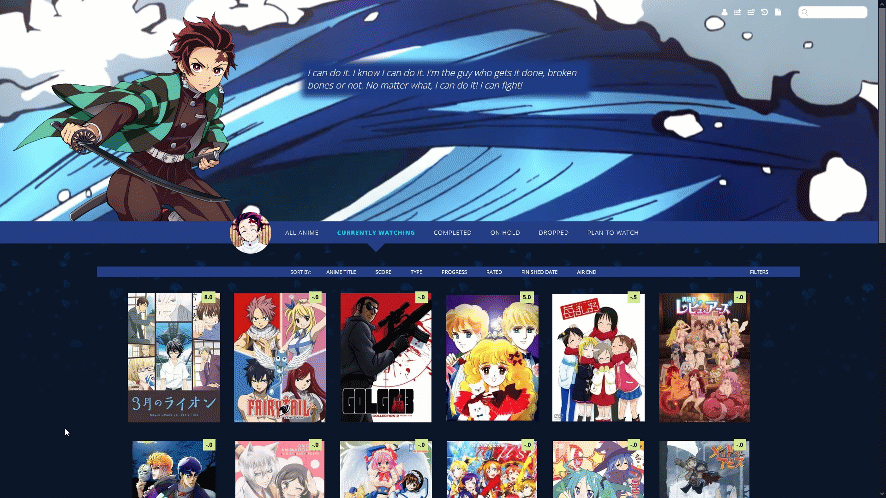
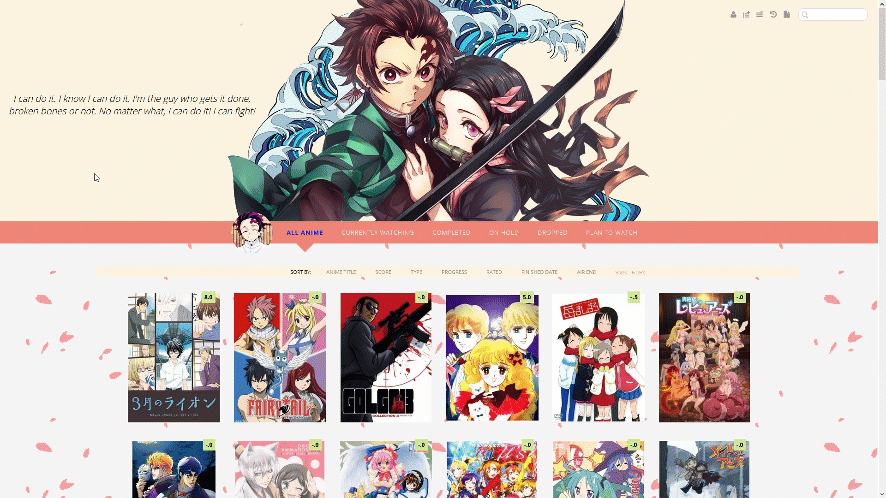
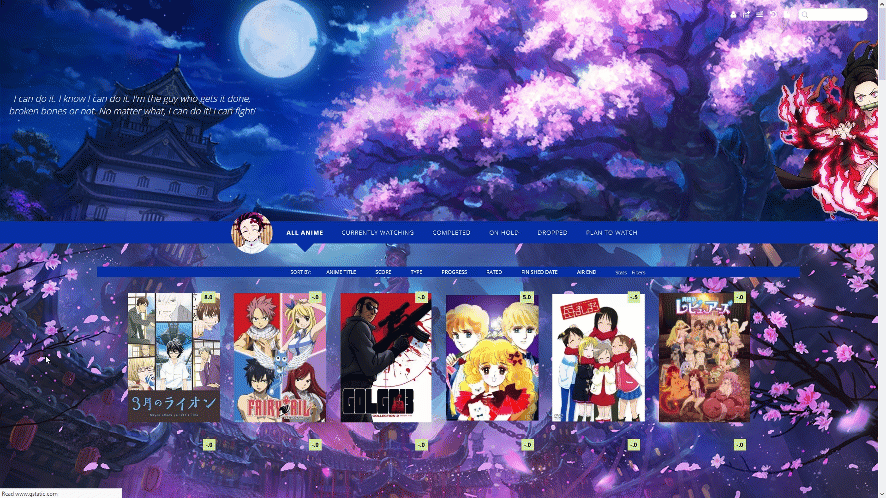
Water and Sun Breathing Layout
Animated Intro
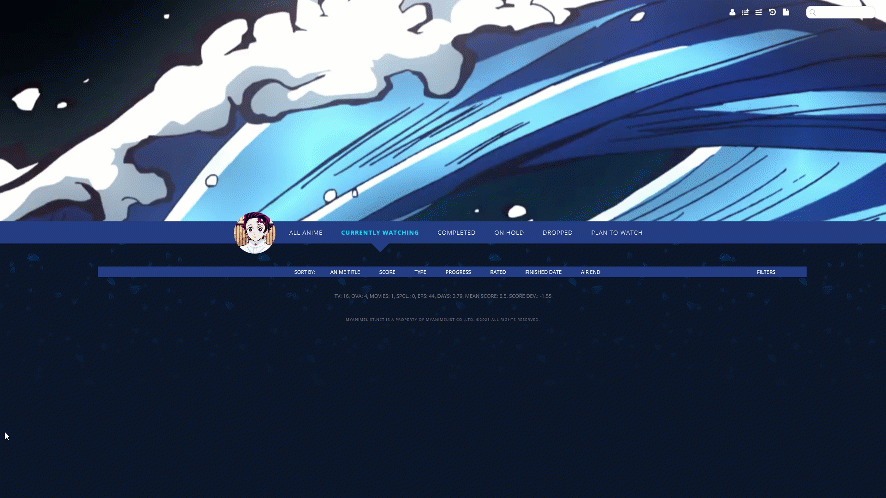
After Intro
Source Code
Important, Read: After you paste the code to your CSS edit box, you should change "SpaceCowboy" and "DateYukata" in the second and third imports to your username. This provides personalized HD preview pics which are more reliable than the defaults. Your list(s) will also load significantly faster this way. However, lists set to private and friends-only can't use personalized preview pics and shouldn't edit them. https://pastebin.com/raw/8PEnfKMG Adding a dark overlay to anime/manga After installing the layout, add these codes to the bottom if you want an easy to read dark overlay on your anime and manga.
/* DARK OVERLAY ON ANIME/MANGA Shows up when you point the cursor to them. This will override the original codes used to customize some of the colors and overlay. */ .list-table .list-table-data:hover .data.title { background: rgba(5,5,5,0.8); outline: 3px solid rgba(45,45,45,0.8); } /* OVERLAY FONT COLOR */ body,.list-table .list-table-data .data.volume a,.list-table .list-table-data .data.progress,.list-table .list-table-data .data.chapter a,.list-table .list-table-data .data.studio,.list-table .list-table-data .data.licensor,.list-table .list-table-data .data.progress a,.list-table .list-table-data .data.magazine a,.list-table .list-table-data .data.studio a,.list-table .list-table-data .data.licensor a,.list-table .list-table-data .data.tags a,.list-table .list-table-data .tags .edit{ color: rgb(232, 230, 227) !important ; } .list-table .list-table-data .data.progress .fa:hover{ color: #90ee90; } /* ANIME TITLE */ .list-table .list-table-data .data.title .link{ color: #C8C3BC !important; }
Default Layouts (Dark Versions available)
With GIF banner

With Animated Intro and No Backgrounds

With Animated Intro and Backgrounds
Source Code
Important, Read: After you paste the code to your CSS edit box, you should change "SpaceCowboy" and "DateYukata" in the second and third imports to your username. This provides personalized HD preview pics which are more reliable than the defaults. Your list(s) will also load significantly faster this way. However, lists set to private and friends-only can't use personalized preview pics and shouldn't edit them. Dark: https://pastebin.com/raw/LiAFspAV Dark: https://pastebin.com/raw/jdQiEudx With Backgrounds and intro: https://pastebin.com/raw/5hYgFbms With Intros and no backgrounds, Light: https://pastebin.com/raw/8YcA3ZBy With Intros and no backgrounds, Dark: https://pastebin.com/raw/9UBBBEtB Adding a dark overlay to anime/manga After installing the layout, add these codes to the bottom if you want an easy to read dark overlay on your anime and manga.
Light: https://pastebin.com/raw/44pxdtUf
Light: https://pastebin.com/raw/jbEuy64n
/* DARK OVERLAY ON ANIME/MANGA Shows up when you point the cursor to them. This will override the original codes used to customize some of the colors and overlay. */ .list-table .list-table-data:hover .data.title { background: rgba(5,5,5,0.8); outline: 3px solid rgba(45,45,45,0.8); } /* OVERLAY FONT COLOR */ body,.list-table .list-table-data .data.volume a,.list-table .list-table-data .data.progress,.list-table .list-table-data .data.chapter a,.list-table .list-table-data .data.studio,.list-table .list-table-data .data.licensor,.list-table .list-table-data .data.progress a,.list-table .list-table-data .data.magazine a,.list-table .list-table-data .data.studio a,.list-table .list-table-data .data.licensor a,.list-table .list-table-data .data.tags a,.list-table .list-table-data .tags .edit{ color: rgb(232, 230, 227) !important ; } .list-table .list-table-data .data.progress .fa:hover{ color: #90ee90; } /* ANIME TITLE */ .list-table .list-table-data .data.title .link{ color: #C8C3BC !important; }
Extensions and more customization
Add the codes for the extensions you want to the bottom of the CSS.
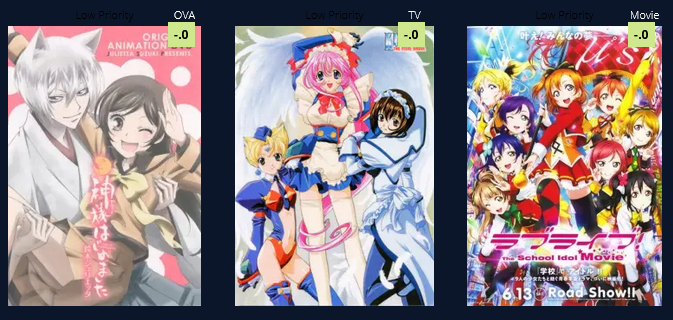
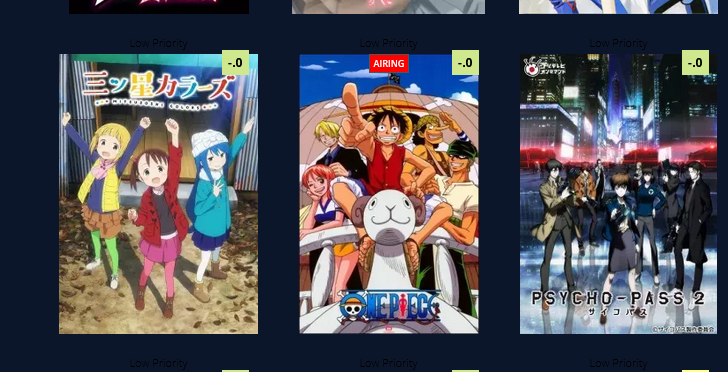
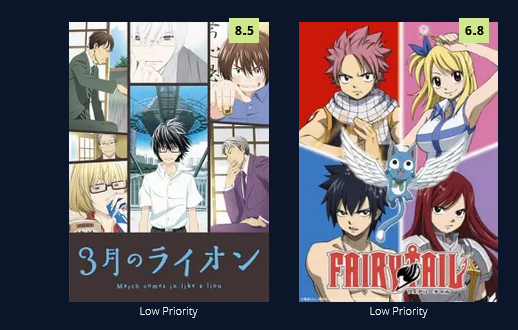
Increase or decrease Header/Banner Size .header { /* SEARCH BOX POSITION .status-menu-container .search-container #search-box input { .status-menu-container .search-container #search-button .fa{ #status-menu .search-container { @media only screen and (min-width: 1100px) { .list-menu-float { .header .header-menu .header-info { #header-menu-dropdown { .header .header-menu.other .btn-menu { } @media only screen and (min-width: 1500px) { .list-menu-float { .header .header-menu .header-info { #header-menu-dropdown { .header .header-menu.other .btn-menu { /*FIXED SORT MENU*/ .list-table-header { More help with renders here: /* RAYNARE */ @keyframes RAYNARE { /* NEKO */ @keyframes NEKO { .list-menu-float { .list-table .list-table-data .data.tags{ .list-table .list-table-data .data.tags span a { .list-table .list-table-data .season{ .list-table .list-table-data .rated{ .list-table .list-table-data .type{ .list-table .list-table-data .airing-started{ .list-table .list-table-data .airing-finished{ .list-table .list-table-data .started{ .list-table .list-table-data .finished{ .list-table .list-table-data .days{ .list-table .list-table-data .storage{ .list-table .list-table-data:hover .priority{ This can be useful when an animes tags are interfering with the title or if you want to add extra tag info with one of our tutorials. Add this code, and change the number to the number that appears in the anime's URL on its MAL page. #tags-31646{ #tags-31646 span a { /*SHOW SEASON AT ALL TIMES*/ .list-table .list-table-data .data.season { If it conflicts with other extensions, change the margin, top, left, etc pixel amount settings in the extensions to move the text you want to a new place. /*SHOW TYPE AT ALL TIMES*/ .list-table .list-table-data .data.type { .list-table .list-table-data .data.rated { .list-table .list-table-data .data.title .rewatching, If it conflicts with other extensions, change the margin, top, left, etc pixel amount settings in the extensions to move the text you want to a new place. .list-table .list-table-data .data.priority{ If it conflicts with other extensions, change the margin, top, left, etc pixel amount settings in the extensions to move the text you want to a new place. .list-table .list-table-data .data.title .link { } .list-table .list-table-data:hover .data.title .link { font-weight: bold; Titles always seen with background .list-table .list-table-data .data.title .link { } .list-table .list-table-data:hover .data.title .link { padding-left: 0px; .list-table .list-table-data .data.priority{ on hover .list-table .list-table-data:hover .data.priority{ .list-table .list-table-data:hover .data .edit a, If it conflicts with other extensions, change the margin, top, left, etc pixel amount settings in the extensions to move the text you want to a new place. /*STATUS TEXT*/ .list-table .list-table-data .data.status{ [data-query*='"status":7'] .data.status.watching:after{ .list-table .list-table-data:hover .data.status{ .list-table .list-table-data:hover .data.status{ .list-table .list-table-data:hover .data.status{ .list-table .list-table-data .data.tags { .list-table .list-table-data .data.title .rewatching, You can use these codes for adding more cherry blossom animations to the background or header. Use this topic if the codes don't work or if you want to change the blossom colors, it has a lot of information on it For the default layout's cherry blossoms, you can set their position to fixed to keep them fixed to the page. In front of header /* CHERRY BLOSSOMS */ position: absolute; Wallpaper blossoms /* CHERRY BLOSSOMS */ position: fixed; Fading Blossoms /* CHERRY BLOSSOMS */ position: absolute;
You can adjust the height here to raise or lower it. You might want to adjust the search box after. Background size helps set your banner background, you can remove it if you want, and adjust the background with any codes at the top of your CSS.
background-size: 100%;
height: 800px !important;
}
You will have to move the search box into place with margin codes if you change the size of the header. Or add the extension that fixes the search box and icons in place.
*/
margin-top: -140px;
position: absolute;
margin-left: -80px;
}
margin-top: -115px !important;
position: absolute !important;
margin-left: -10px !important;
}
/*FIXED HEADER MENU*/
top: 0;
right: 20px;
position: fixed;
}
position: fixed !important;tant;
top: 18px;
left: 0;
width: 150px;
border: 0;
z-index: 100 !important;
}
position: fixed;
top: 28px;
left: 0px !important;
width: 200px;
font-size: 0;
z-index: 100 !important;
}
display: block !important;
top: 34px;
left: 200px;
width: 100px;
border: 0;
box-shadow: none;
position: fixed;
z-index: 100 !important;
}
font-size: 12px;
color: #999;
display: inline-block;
overflow: hidden;
text-indent: -55px;
position: fixed;
top: 0px;
left: 18px;
z-index: 100 !important;
}
position: fixed !important;tant;
top: 18px;
left: inherit !important;
right: 200px !important;
width: 150px;
border: 0;
}
position: fixed;
top: 10px;
right: 270px;
left: inherit !important;
width: 200px;
font-size: 0;
}
display: block !important;
top: 16px;
left: inherit;
right: 180px;
width: 100px;
border: 0;
box-shadow: none;
position: fixed;
}
font: 700 25px Open Sans;
color: #999;
display: inline-block;
overflow: hidden;
text-indent: -116px;
position: fixed;
top: 2px;
left: 18px;
}}
background: #1b0133 !important;
position: fixed;
top: 50%;
left: 0;
width: 100px !important;
text-align: left;
z-index: 100 !important;
}
You can replace the image links with other renders. They won't show up until you scroll down so they won't interfere with banners. You can remove
.status-menu-container.fixed ~
and change the z index to change the render's timing and foreground position.
https://myanimelist.net/forum/?topicid=400287
.status-menu-container.fixed ~ .list-block:before{
background-image: url(https://i.imgur.com/obgrDqN.png);
background-position: left bottom;
background-repeat: no-repeat;
background-size: contain;
content: "";
position: fixed;
bottom: 0;
margin: 0 auto !important;
width: 100% !important;
height: 80%;
display: block;
left: -8%;
z-index: -1 !important;
pointer-events: none;
animation: RAYNARE 1s 1;
}
0% {
left: -55%;
}
80% {
left: -55%;
}
100% {
left: -8%;
}
}
.status-menu-container.fixed ~ .list-block:after{
background-image: url(https://i.imgur.com/RWiIVh9.png);
background-position: right bottom;
background-repeat: no-repeat;
background-size: contain;
content: "";
position: fixed;
bottom: 0;
margin: 0 auto !important;
width: 100% !important;
height: 80%;
display: block;
right: -8%;
z-index: -1 !important;
pointer-events: none;
animation: NEKO 1s 1;
}
0% {
right: -55%;
}
80% {
right: -55%;
}
100% {
right: -8%;
}
}
Increase the px after border from 0, to have a border around it. You can control the border color in the same line. Use margin top to reposition the container. There's already other codes in the layouts to control icon color including for the search bar on the right.
background: white;
padding: 4px;
border-radius: 10px;
border: 0px solid black !important;
animation: FADEIN 10s 1;
margin-top: -5px;
}
This moves the tags to the right as in the example but also moves airing, started/finished times, season, days, rating, type, and storage inside where tags were! If you only want the tags moved, just use the top two sets of code (which have tags in the names). You can also move the other text moved inside with these codes through the margin left and top codes.
background-color: whitesmoke;
position: absolute;
margin-left: 200px;
z-index: 100 !important;
height: 160px;
padding: 10px;
border: white 5px solid;
}
color: black !important;
font-size: 12px;
}
margin-top: -190px !important;
}
margin-top: 69px !important;
margin-left: 70px !important;
}
margin-top: 69px !important;
margin-left: -40px !important;
}
margin-top: 90px !important;
margin-left: -50px !important;
}
margin-top: 90px !important;
margin-left: 50px !important;
}
margin-top: 110px !important;
margin-left: -53px !important;
}
margin-top: 110px !important;
margin-left: 54px !important;
}
margin-top: 130px !important;
margin-left: -80px !important;
}
margin-top: 130px !important;
margin-left: -20px !important;
}
opacity: 1 !important;
}
background-color: whitesmoke;
position: absolute;
margin-left: 190px;
z-index: 100 !important;
height: 160px;
padding: 10px;
border: white 5px solid;
}
color: black !important;
font-size: 12px;
}
opacity: 1 !important;
}
opacity: 1 !important;
color: white;
margin-top: -20px;
margin-left: 130px;
}
position: absolute;
color: black !important;
height: 10px !important;
margin-top: 242px;
margin-left: 80px;
}
.list-table .list-table-data .data.title .rereading,
.list-table .list-table-data .data.title .content-status {
background: red;
opacity: 1 !important;
color: white;
}
margin-top: 280px;
color: white !Important;
}
position: absolute;
left: 5px;
top:235px;
width: 200px;
z-index: 51 !important;
opacity: 1 !important;
font-size: 12px;
color: white !important;
font-weight: bold;
text-shadow:0 0 5px #000,0 0 5px #000,5px 1px 11px #000,0 0 0 #fff !important;
position: absolute;
left: 13px;
bottom: 43px;
top: inherit;
width: 160px;
z-index: 51 !important;
opacity: 1;
font-size: 20px;
line-height: 22px;
text-transform: upper;
color: black !important;
text-shadow: none !important;
}
position: absolute;
left: -10px;
top:225px;
width: 180px;
z-index: 51 !important;
opacity: 1 !important;
font-size: 12px;
color: white !important;
font-weight: bold;
text-shadow:0 0 5px #000,0 0 5px #000,5px 1px 11px #000,0 0 0 #fff !important;
background: rgba(0,0,0,.5);
padding-bottom: 50px;
padding-left: 5px;
position: absolute;
left: 13px;
bottom: 43px !important;
top: inherit;
width: 160px;
z-index: 51 !important;
opacity: 1;
font-size: 20px;
line-height: 22px;
text-transform: upper;
color: black !important;
padding-bottom: 0px;
background: transparent;
font-weight: bold;
text-shadow: none !important;
}

margin-top: 5px;
margin-left:-5px;
color: black !Important;
width: 30px;
height: 25px;
text-align: left;
background: orange;
padding-bottom: 10px;
padding-left: 5px;
padding-right:10px;
}
margin-top: -20px;
margin-left:-5px;
color: white !Important;
width: 80px;
height: 5px;
opacity: 1;
text-align: left;
background:transparent;
}
.list-table .list-table-data:hover .data .add-edit-more a{
height: 240px;
width: 100%;
left: 20px !important;
top: 0;
top: 0px !important;
color: green !important;
}
[data-query*='"status":7'] .data.status.watching:after,
[data-query*='"status":7'].data.status.reading:after,
[data-query*='"status":7'] .data.status.completed:after,
[data-query*='"status":7'] .data.status.onhold:after,
[data-query*='"status":7'] .data.status.dropped:after,
[data-query*='"status":7'] .data.status.plantowatch:after,
[data-query*='"status":7'] .data.status.plantoread:after
{
margin-top: 0px !important;
font-weight: bold;
position: absolute !important;
margin-left: 0px !important;
left: 0 !important;
width: 200px !Important;
text-shadow:0 0 5px #000,0 0 5px #000,5px 1px 11px #000,0 0 0 #fff !important;
opacity: 1 !important;
display: block !important;
color: white !important;
z-index: 10 !important;
pointer-events: none !important;
}
display: block !important;
background: transparent !important;
}
content: "Currently Watching";
}
[data-query*='"status":7'] .data.status.reading:after{
content: "Currently Reading";
}
[data-query*='"status":7'] .data.status.completed:after{
content: "Completed";
}
[data-query*='"status":7'] .data.status.onhold:after{
content: "On Hold";
}
[data-query*='"status":7'] .data.status.dropped:after{
content: "Dropped";
}
[data-query*='"status":7'] .data.status.plantowatch:after{
content: "Plan to Watch";
}
[data-query*='"status":7'] .data.status.plantoread:after{
content: "Plan to Read";
}
margin-top: 60px;
opacity: 0;
}
opacity: 1;
}
margin-top: 0px;
}
margin-top: 80px;
}
.list-table .list-table-data .data.title .rereading,
.list-table .list-table-data .data.title .content-status {
margin-top: 60px;
margin-left:57px;
position: absolute;
}
https://myanimelist.net/forum/?topicid=1911984
.list-container:after {
filter: hue-rotate(0deg);
left: 0;
top: -500px;
content: '';
width: 100%;
height: 500px;
background-image: url(https://i.imgur.com/QqP0mWL.png),
url(https://i.imgur.com/Io1Lzgf.png),
url(https://i.imgur.com/Ulp6xjS.png);
animation: SAKURA 10s linear infinite;
z-index: 5;
pointer-events: none !important;
}
@keyframes SAKURA {
0% { background-position: 0 0, 0 0, 0 0; }
100% { background-position: 500px 1000px, 400px 400px, 300px 300px; }
}
.list-container:after {
filter: hue-rotate(0deg);
left: 0;
top: 0;
content: '';
width: 100%;
height: 100%;
background-image: url(https://i.imgur.com/QqP0mWL.png),
url(https://i.imgur.com/Io1Lzgf.png),
url(https://i.imgur.com/Ulp6xjS.png);
animation: SAKURA 10s linear infinite;
z-index: -5;
pointer-events: none !important;
}
@keyframes SAKURA {
0% { background-position: 0 0, 0 0, 0 0; }
100% { background-position: 500px 1000px, 400px 400px, 300px 300px; }
}
.list-container:after {
filter: hue-rotate(0deg);
left: 0;
top: 00px;
content: '';
width: 100%;
height: 900px;
background-image: url(https://i.imgur.com/QqP0mWL.png),
url(https://i.imgur.com/Io1Lzgf.png),
url(https://i.imgur.com/Ulp6xjS.png);
animation: SAKURA 10s linear infinite;
z-index: -5;
pointer-events: none !important;
-webkit-mask-image: linear-gradient(to top, transparent 20%, black);
mask-image: linear-gradient(to top, transparent 20%, black);
}
@keyframes SAKURA {
0% { background-position: 0 0, 0 0, 0 0; }
100% { background-position: 500px 1000px, 400px 400px, 300px 300px; }
}
How to Get a Cool Mal List Animated Backgroun
Source: https://myanimelist.net/forum/?topicid=1927876
0 Response to "How to Get a Cool Mal List Animated Backgroun"
Post a Comment